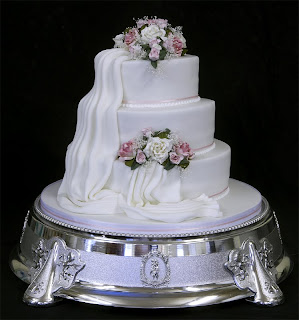
That day you've secretly feared since you started decorating cakes is quickly approaching. You've been asked to make a wedding cake - a five tiered, stacked wedding cake! And it's for your sister's wedding!

As you go over designs with your sister by day, you dream about the cake at night. The cake in your dreams is taller than any cake you've even seen. As bride and groom pose for the cake cutting ceremony pictures, you look on as each tier slowly sinks into the one beneath it, and just as your sister and her new husband smile and begin to slice their first piece of cake, the force of gravity and the domino effect take hold and the cake implodes.
All four top tiers sink into the bottom tier, turning a once majestic beauty into a giant pile of fondant covered cake rubble! (And then you wake up, covered in sweat, only to realize that this dream could actually become reality.)
But wait! This nightmare does not have to become reality. And no, you won't have to add therapist bills to your cake budget to get through your big project. These sorts of nightmares are normal for first time wedding cake makers. Beyond a healthy amount of butterflies, you have absolutely nothing to fear if you follow these tips.
Stacked Wedding Cake Construction 101
Unlike wedding cakes with tiers that are separated by plates and pillars, the tiers on a stacked wedding cake appear to rest directly on top of one another. This is just an illusion since the cakes actually rest on a system of hidden pillars and plates. To stack a multi-tiered cake without plates and pillars is a very risky proposition with the weight of each cake.
Stacked cakes of more than 4 layers need some sort of support in the form of plates, spikes and/or dowels to keep the upper layers from sinking into the lower layers.
So whether your wedding cake will be stacked Victorian style (graduating round tiers) or à la chic with fondant covered gift-box style tiers, here are the basics:
To create a perfectly constructed tower rather than an experiment on the effects of gravity on cake and icing, you can either use a purchased set of cake plates and spikes, or you can build your own system using cardboard cake plates and dowels.
To build your own system, pick up some 1/4-3/8-inch round cake dowels (or other food safe wooden dowels) and a hammer (yes, even if you flunked high school Woodshop) and follow these tips:
1. Plan the dowels' placement by centering a cake plate the size of the next cake to be placed on top of the bottom cake, and then marking the spot by pressing down gently on the plate.
2. Within the boundaries of these markings, insert four evenly spaced dowels. Insert the first dowel straight down through to the bottom of the cake and mark the dowel even with the top of the cake. Pull out the dowel and, using wire cutters, cut off at the mark. Cut three more the same height. Then push the dowels straight down into the cake in the places you marked so that they form a square inside the circle. (Be sure the dowels are perfectly even with the top of the cake for the best support.)
 3. Place your next smaller tier on a round cake board of the same size, and then place it on top of the bottom tier. The dowels will prevent the top tier from sinking into the bottom tier.
4. Measure the next set of dowels from the bottom of the bottom cake to the top of the top cake. Cut the dowel at an angle to taper the end and cut it so that it is just slightly shorter than the height of the two bottom cakes. Insert the dowels tapered end first straight down through the cake. When the dowel stops at the first cake board, give it a firm tap with the hammer to break through the board down to the bottom of the cake. To prevent the hammer from landing in the icing, place another small section of dowel end to end with the measured dowel to hammer it into position.
5. Finally, ice over the little blemish to hide the tip of the dowel, and your tower construction is finished! You can rest easy knowing that your wedding cake is stable enough to withstand the forces of gravity. No more nightmares!


